
Vegan & Gluten Free Carrot Cake
I finally made it!!! It’s been since December that I have had in mind to make this cake, mainly to try the frosting.
So, let me step back to almost 3 months ago…December 17th. It was a Monday and the restaurant where my boyfriend works hosted a Christmas party for all the employees and their family. Lorna, one of the bartenders, offered to make a cake for the party and brought two large trays of a wonderful carrot cake (vegan and gluten free) with an amazing frosting. Lorna cooks my same style and is a healthy eater like me: the food provided by the restaurant that night was good but not really that kind of healthy food I like to eat (not that I was expecting to eat healthy, but it could have definitely been a little healthier…) so, the idea of having a dessert in line with my way of eating made me really happy. I love desserts and I knew I would have not been able to pass on it that night, but if dessert means a vegan carrot cake, I can probably eat a little more than usual ☺
I asked her what she used to make the frosting (that was probably one of the best I had ever had) and she mentioned to me the Miyoko’s brand cream cheese spread that I had never heard of but that I went to buy right away at the local Sprouts Farmers Market. After 3 months, I finally decided it was time to take this spread out of the fridge and use it.
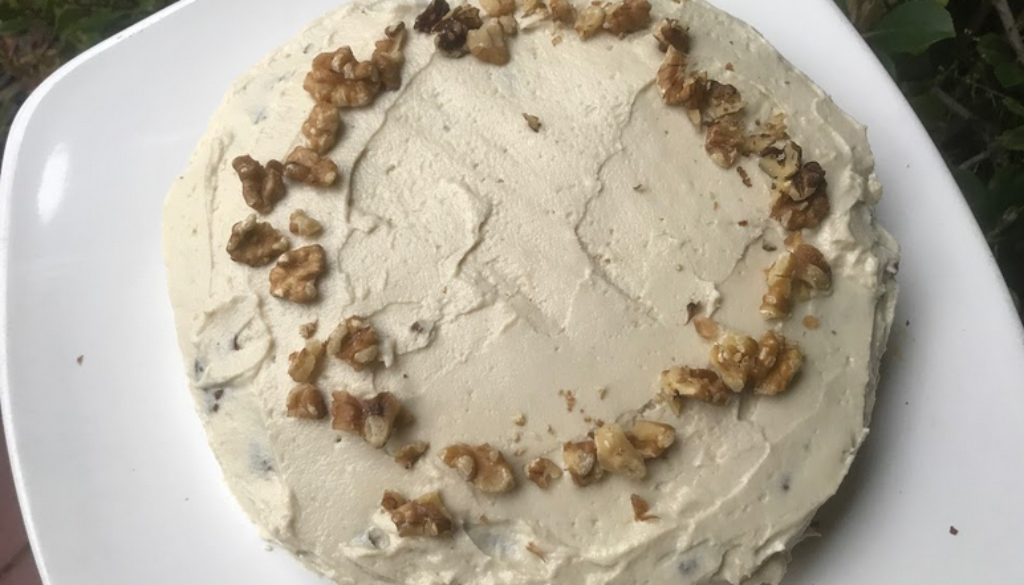
Result was great (both cake and frosting) and I would definitely recommend this spread to all those who do not want or have time to prepare their own frosting, although this is basically made of cashews, so definitely something you can make yourself! For those who would like to try a home-made frosting, I am going to offer a version that I made a few years ago for a pineapple-carrot cake and that turned out great.
The cake is vegan & gluten free and so is the frosting. The frosting version with the Miyoko’s spread is also sugar-free (I used powdered Swerve instead of sugar) but the home-made one isn’t and the two frostings are made in different ways. For the home-made frosting you will need a very powerful blender. If you use a ready-made spread, instead, you’ll need electric whisks.
To make both cake and frosting I used my Christmas raffle prize: a beautiful Kitchen Aid, that I had wanted for years (I couldn’t have won a more suitable prize, honestly…). Let’s be realistic: this is not an indispensable appliance but once you have it you will never want to make a cake or a mousse again without it … it’s such a great help having a mixing bowl that works on its own while you pour ingredients in it!!! Not to mention whipping cream, eggs or making a tiramisu … Kitchen Aid simplifies your baking life!

| Servings |
|
- 3 batches flax egg 3 Tbsp flaxseed meal + 7 ½ Tbsp water as original recipe is written
- 1/3 cup melted coconut oil
- 1/8 cup agave nectar
- 1 cup unsweetened applesauce well rounded
- 1/2 cup organic coconut sugar well rounded
- 3/4 tsp sea salt
- 1.5 tsp baking soda
- 1.5 tsp baking powder
- 1.5 tsp ground cinnamon
- 3/4 cup vanilla unsweetened almond milk
- 1.5 cups grated carrots
- 1.5 cups Almond Flour
- 1.5 cups brown rice flour
- 3/4 cup raw walnuts chopped
- 1/2 cup raisins
- 8 oz Miyoko’s Vegan Cream Cheese Spread * plain
- 1/2 cup powdered Swerve
- 1/8 cup agave nectar
- 1 tsp pure vanilla extract
- 2 cups cashews *** soaked overnight
- Half Lemon juiced
- 1 tsp lemon zest
- 1/2 tsp vanilla extract
- 1/3 cup maple syrup or liquid sweetener of choice (raw honey coconut nectar, stevia—only use a few drops)
- 1/8 teaspoon Himalayan salt
- 1/2 cup coconut water****
Ingredients
CAKE:
USING READY-MADE CREAM CHEESE
MAKING YOUR OWN VEGAN CREAM CHEESE
|
|
- Preheat oven to 350F. Cover with parchment paper a 9”x 13” or two 8” round pans. I used a 9” round pan and I could tell it was a little too small, so beware!
- Prepare flax eggs in a large mixing bowl by mixing flax seeds with water and stirring well, then refrigerate to thicken.
- While flax eggs are in the fridge, prepare the carrots: peel, wash and grate them.
- In a large mixing bowl add flax eggs, melted coconut oil and agave nectar and whisk to combine. Next, add applesauce, coconut sugar, salt, baking soda, baking powder and cinnamon and keep whisking.
- While stirring, keep adding ingredients one at a time: almond milk, grated carrots, almond flour and gluten-free flour (Kitchen Aid was stirring for me, ha!)
- The batter should be thick but pourable. If too thick, add about ¼ more cup almond milk.
- As last, add walnuts and raisins, then mix well with a spatula (I removed the kitchen aid attachment for this last step.

- Spread batter evenly in the pan.
- Bake for about 50 minutes, then insert a toothpick to check: the toothpick needs to comes out completely clean and the cake should be golden brown on top: when you press on the top, it shouldn’t feel too spongy. Remember that gluten-free cakes take a little longer to bake, so don’t be afraid of over-baking. Also, note that the size of pan you use will vary baking time. In case you notice the cake is not well cooked inside yet, although already browned on the top, let the it cook for an additional 10~15 minutes covering the pan with a sheet of foil – this will allow the cake to cook without burning on top (I had to go for the extra 10 minutes since my oven is not very strong).
- Remove from oven and let rest in the pan for 15 minutes until the cake reaches room temperature. NOTE: This cake needs to cool completely. It benefits from plenty of airflow, and the flavors develop as the cooling process goes on.
- Once cooled, you can serve as is or frost! Do not frost the cake until it has reached room temperature.
- If you do not use any frosting, the cake can be stored at room temperature, covered, for 2-3 days; however, if you decide to frost it, it should be stored in the refrigerator for no more than 3-4 days (or covered well in the freezer for several weeks … though it's best when eaten fresh!). When removing it from the refrigerator, let it sit at room temperature for 10-15 minutes before serving so it warms a bit and becomes more tender.

- Make sure you take the spread out of the fridge a good 10-15 minutes before starting to whisk.
- If using a ready-made vegan spread, all you have to do is to place the ingredients for the frosting in a bowl and start whisking until you reach a creamy but firm texture. The dosage I listed is enough to spread on top and sides of cake, there is NOT enough to also fill the cake, so if you wish to spread a layer of frosting inside the cake, you may want to almost double the quantity of each ingredient.
- For this home-made version I recommend a very powerful blender like Vitamix (this is, in fact, what I used) otherwise you may end up having a granular and not too creamy spread.
- In the bowl of your blender, add ingredients in the following order: juice & grated lemon zest, vanilla extract, maple syrup, salt and cashews as last.
- Do not pour any coconut water at this moment but keep this on a side as you’ll add it just if needed (in case the spread turns out too thick to blend smoothly).
- Start mixing all the ingredients: pulse function is suggested but if you do not have such function you may need to stop blending several times and stir the cashew mix with the help of a spoon to help the blender. Don’t try to add too much liquid as the spread needs to stay firm.
- Keep blending in batches until you obtain a creamy but firm spread: put it in a glass container and refrigerate to thicken.

- Using my Vitamix (which is very powerful) I only had to add 20ml coconut water.
- I recommend leaving this spread in the fridge for at least 6~8 hours before decorating the cake.

* I tried a couple vegan cream cheese spreads but, in my opinion, Miyoko’s is the best. No other brand beats it (at least, for what you can find here in the US and for what I have experimented and tasted so far). It is not cheap (and this is one of the reasons why I recommend making your own is better) but if you want to save some time, that’s definitely your go-to vegan base for a frosting ☺ If someone knows a better one, leave me the name in the comments section and I’ll try it! ** Swerve is a sugar-free natural sweetener and I love it because it doesn’t have that pungent taste typical of stevia and it is perfect for baking and for mousses as it acts exactly like sugar, without altering the taste. I used it for the frosting because I wanted it to be sugar-free (the cake already has plenty of sugars), although you can replace it with other sugars of your choice (make sure you “powder” your sugars if they aren’t already powdered – simply blend sugar to powder it) but stay away from stevia as it will severely affect the taste. If you want to add stevia, I recommend no more than 1/8 cup out of the ½ cup of sugar. Also, I do not recommend using any liquid syrup as it will loosen the consistency of the frosting. The 1/8 cup agave nectar that I added was just enough to sweeten without compromising the firmness of the spread. *** Cashews will grow when absorbing water: 2 cups of raw cashews will result in about 2.5 cups soaked cashews. **** You may need much less coconut water, so be sure not to pour it all at once but add it gradually and as needed
